A Strawberry Vanilla Cake So Beautiful It Looks Bakery-Made
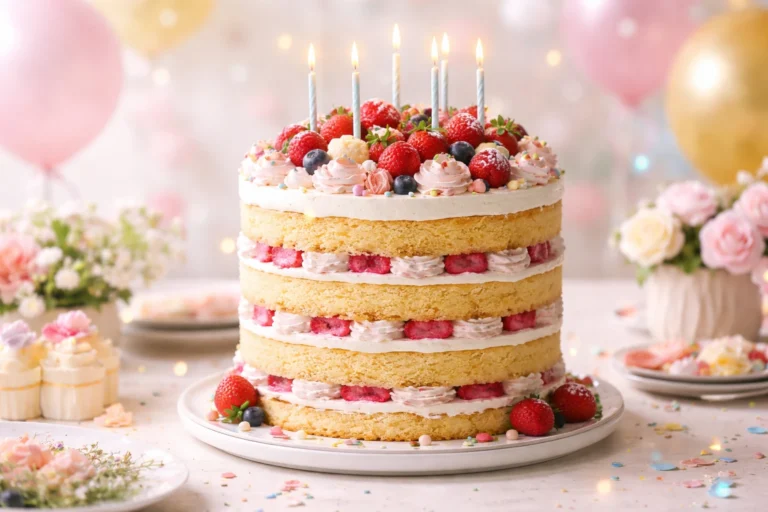
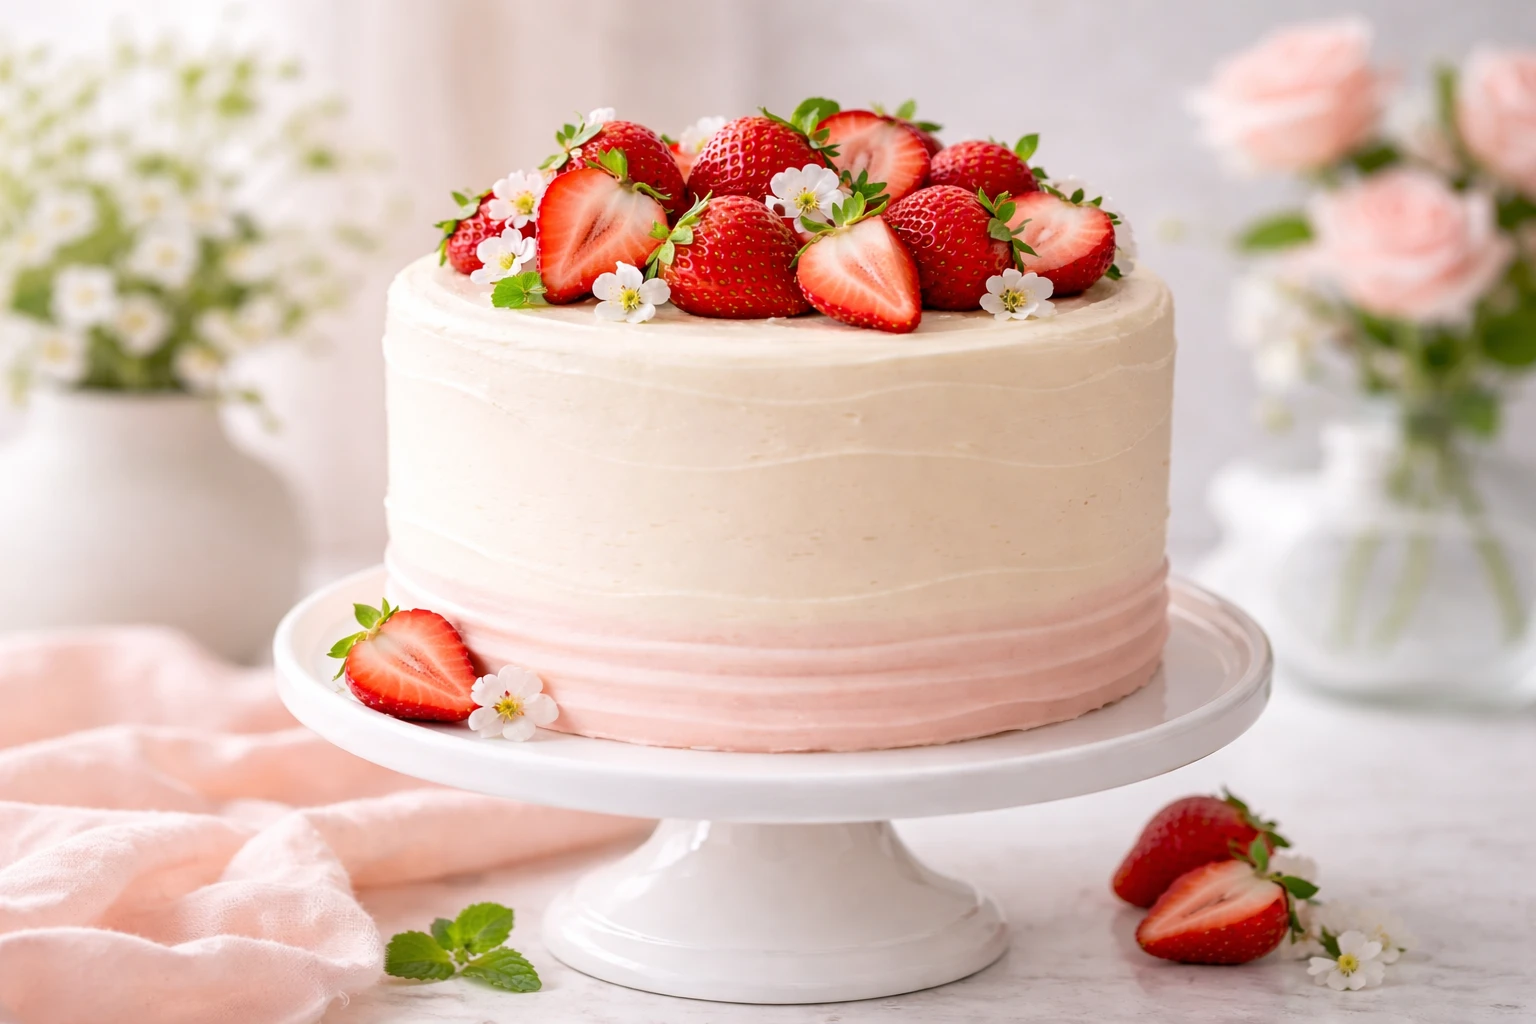
There are desserts you make for convenience, and then there are desserts you make to impress. This strawberry vanilla cake falls firmly into the second category. It’s the kind of cake that turns heads the moment it’s placed on the table—soft pink hues, smooth buttercream edges, and delicate layers that hint at something special inside. It looks like it came from a high-end bakery window, yet it’s entirely achievable in your own kitchen with the right approach and a bit of patience.
What makes this cake truly exceptional is not just its beauty, but its balance. The vanilla layers are soft and tender without being fragile, the strawberry filling adds a bright, natural sweetness, and the buttercream ties everything together with a smooth, creamy finish. Every bite feels intentional. Nothing is overly sweet or overwhelming, which is often the downfall of decorative cakes. Instead, this one feels light, fresh, and refined.
This guide isn’t just about following a recipe—it’s about understanding the process. When you understand why each step matters, you gain control over the outcome. That’s how you move from simply baking a cake to creating something that genuinely looks bakery-made. By the end of this post, you’ll not only know how to make this cake—you’ll know how to elevate it.
Why This Strawberry Vanilla Cake Stands Out
There are countless strawberry cake recipes out there, but many rely on shortcuts—artificial flavorings, boxed mixes, or overly sweet fillings. While those options can be convenient, they rarely deliver the same depth of flavor or visual appeal. This cake is different because it focuses on real ingredients and technique, which ultimately produces a more refined result.
The vanilla cake layers are designed to be both soft and stable. This is important because a cake that’s too delicate will collapse under layers of filling and frosting, while one that’s too dense will feel heavy. This recipe strikes that balance perfectly, giving you a structure that’s easy to work with while still feeling light and airy when you eat it.
The strawberry filling is another standout feature. Instead of using jam, which can be overly sweet and sticky, this version uses fresh strawberries cooked down into a thick, flavorful reduction. The result is a filling that tastes bright and slightly tangy, complementing the sweetness of the cake and buttercream rather than competing with it.
Visually, this cake offers endless possibilities. Whether you choose a clean, minimalist finish or a more decorative style, the base design lends itself to a polished, professional appearance. That’s what makes it so versatile—it can be adapted for birthdays, weddings, showers, or any occasion where presentation matters.
Understanding the Ingredients (The Real Secret to Success)
A great cake starts long before it goes into the oven. It begins with understanding your ingredients and how they interact. Baking is a science, and even small changes can affect the final result in noticeable ways.
Flour is one of the most important components. Cake flour is preferred here because of its lower protein content, which results in a softer crumb. When flour contains less protein, it forms less gluten, and that’s what gives the cake its tender texture. Using all-purpose flour can work, but the cake will be slightly denser.
Butter plays multiple roles. It adds flavor, richness, and helps create structure when creamed with sugar. During the creaming process, tiny air pockets are formed, which expand during baking and contribute to the cake’s light texture. This is why properly creaming butter and sugar is so important—it’s not just about mixing, it’s about aeration.
Eggs act as a binding agent while also adding moisture and structure. They help stabilize the batter and ensure the cake holds together after baking. Adding them gradually prevents the mixture from separating, which can affect the final texture.
Sour cream is often overlooked, but it makes a significant difference. It adds moisture without making the batter too thin, and it contributes to a slightly richer flavor. This helps the cake stay soft even after being refrigerated.
For the filling, fresh strawberries are essential. They provide natural sweetness and acidity, which keeps the flavor balanced. The addition of lemon juice enhances the strawberries and prevents the filling from tasting flat.
Step 1: Baking the Perfect Vanilla Cake Layers
The cake layers form the foundation of everything, so getting them right is critical. Begin by creaming the butter and sugar together until the mixture becomes pale and fluffy. This step usually takes several minutes, but it’s worth the time because it directly affects the texture of your cake.
Once the butter and sugar are properly creamed, add the eggs one at a time. This allows each egg to fully incorporate into the mixture, creating a smooth and stable batter. Adding them too quickly can cause the mixture to curdle, which may affect how the cake bakes.
When combining the dry ingredients with the wet ingredients, it’s important to mix gently. Overmixing can develop too much gluten, resulting in a tougher cake. The goal is to mix just until everything is combined.
Dividing the batter evenly between pans ensures that the layers bake uniformly. This is especially important for achieving a professional look. Uneven layers can lead to a tilted cake, which is difficult to correct later.
After baking, allow the layers to cool completely. This step is often rushed, but it’s essential. Warm cake layers are fragile and can crumble or melt frosting during assembly.

Step 2: Making Fresh Strawberry Filling
The strawberry filling is where this cake truly comes to life. It adds color, flavor, and a fresh contrast to the richness of the buttercream.
Start by combining chopped strawberries with sugar and lemon juice in a saucepan. As the mixture heats, the strawberries begin to soften and release their juices. This process concentrates the flavor and creates a vibrant, natural sweetness.
To achieve the right consistency, a cornstarch slurry is added. This thickens the mixture into a spreadable filling that holds its shape between layers. Without this step, the filling would be too runny and could cause the cake to slide.
Patience is key here. Let the filling cool completely before using it. This ensures it thickens properly and doesn’t interfere with the structure of the cake.
Step 3: Making Silky Vanilla Buttercream
Buttercream is what transforms your cake from homemade to bakery-style. The texture should be smooth, creamy, and easy to spread.
Begin by beating the butter until it becomes light and fluffy. This step creates a smooth base for the frosting. Gradually add powdered sugar to avoid a grainy texture and ensure even mixing.
Vanilla extract adds depth of flavor, while a small amount of cream helps adjust the consistency. The goal is a buttercream that spreads easily without being too soft.
Whipping the buttercream for an extended period gives it a light, airy texture. This makes it easier to work with and results in a cleaner finish on the cake.
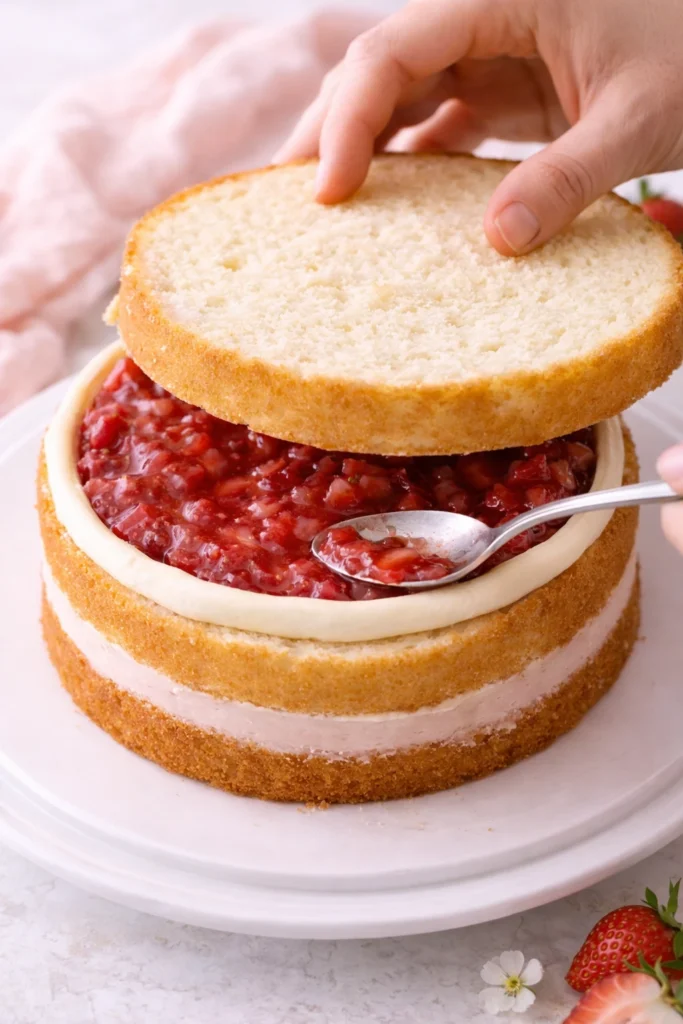
Step 4: Assembling Like a Professional Baker
Assembly is where all your preparation pays off. Start by leveling each cake layer to ensure a flat surface. This creates a stable base and prevents the cake from leaning.
Before adding the filling, pipe a buttercream dam around the edge of the layer. This acts as a barrier and keeps the strawberry filling contained.
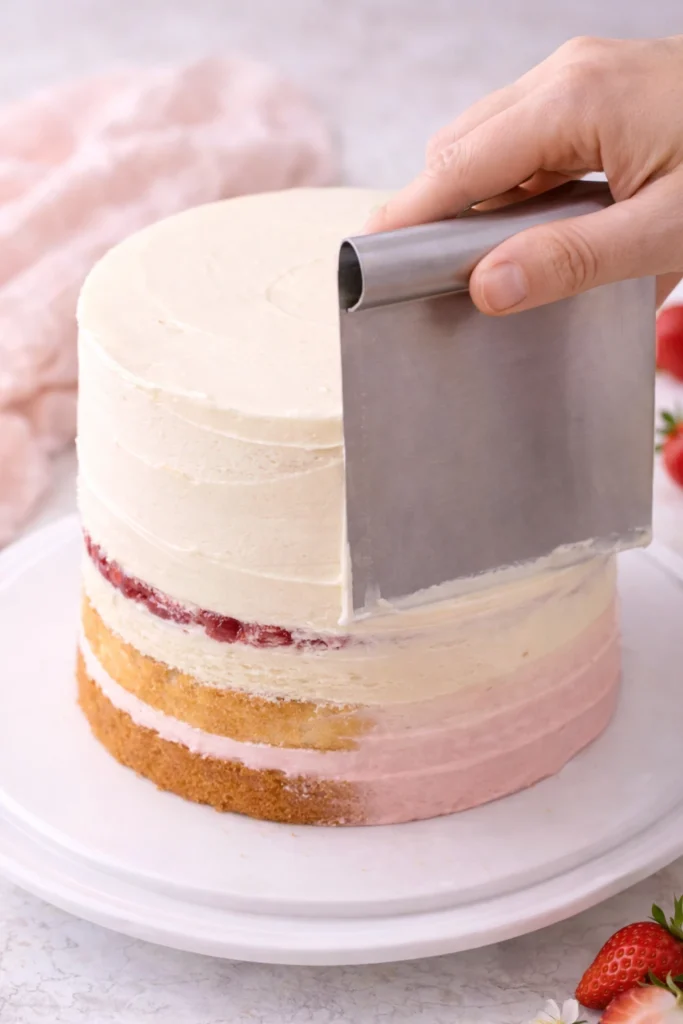
Stack the layers carefully, pressing gently to secure them in place. Once assembled, apply a thin crumb coat and chill the cake. This step locks in crumbs and prepares the surface for the final layer of frosting.
Using a turntable and bench scraper, smooth the sides and top. This is the key to achieving that clean, professional finish.
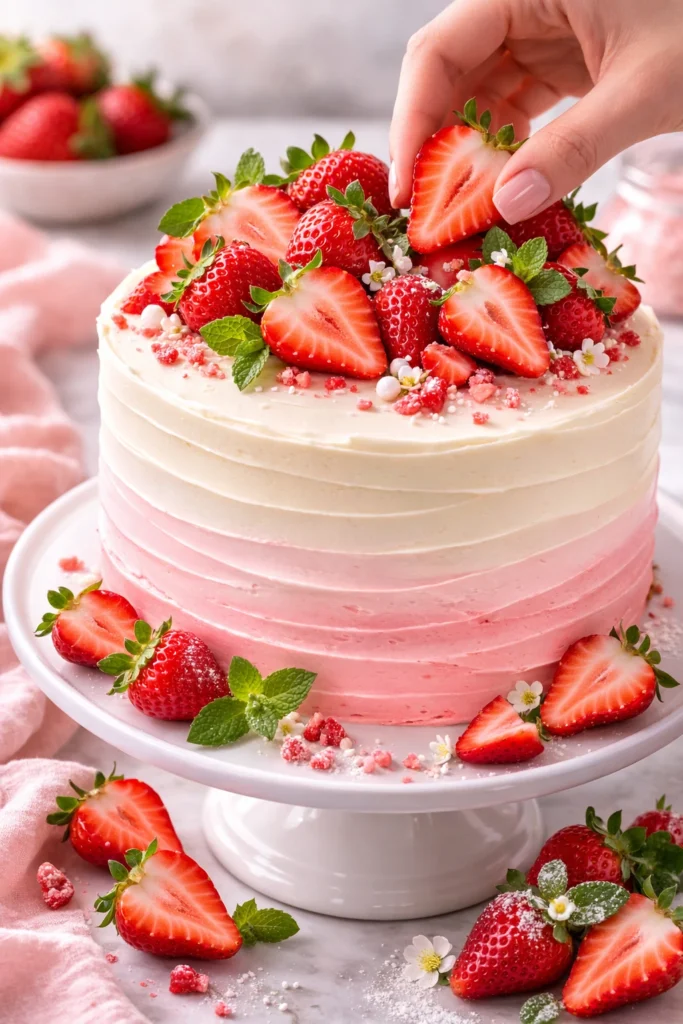
Step 5: Decorating for a Bakery-Style Finish
Decorating is where your cake truly becomes a centerpiece. Even simple techniques can create a stunning effect when done thoughtfully.
A classic approach is topping the cake with fresh strawberries. This highlights the flavor and adds a natural, elegant touch.
For a more decorative look, try a pink ombre effect using tinted buttercream. Blend the colors smoothly to create a soft gradient.
You can also experiment with textures, such as a semi-naked finish or a glossy drip. Each style offers a different aesthetic, allowing you to customize the cake for any occasion.
Common Mistakes and How to Avoid Them
Even with a great recipe, small mistakes can affect the outcome. Understanding these pitfalls helps you avoid them.
Overmixing the batter can lead to a dense cake. Always mix just until combined. Using warm components during assembly can cause the cake to shift or the frosting to melt.
Another common issue is under-thickened filling. If the strawberry mixture is too runny, it can leak out and destabilize the cake.
Rushing the decorating process often results in uneven frosting. Taking your time and working in stages produces a much cleaner finish.
Storage Make-Ahead Tips and Serving
This cake is perfect for planning ahead. The layers can be baked in advance and frozen, while the filling and buttercream can be prepared a few days early.
Once assembled, store the cake in the refrigerator. Before serving, allow it to sit at room temperature so the texture softens and the flavors fully develop.
Flavor Variations and Creative Twists
This cake is incredibly versatile. You can add lemon zest for brightness, swap in cream cheese frosting for a tangy twist, or incorporate white chocolate for extra richness.
You can also adapt the recipe into cupcakes or a sheet cake, making it suitable for different occasions.

Final Thoughts
Creating a cake that looks bakery-made isn’t about perfection—it’s about technique, patience, and attention to detail. This strawberry vanilla cake brings all of those elements together in a way that feels achievable and rewarding.
Once you’ve made it, you’ll realize that bakery-quality results aren’t out of reach. With the right approach, you can create something that looks just as beautiful—and tastes even better.